
The Oster Roaster Oven is a versatile and convenient cooking solution, perfect for roasting, baking, and slow cooking. Its self-basting lid ensures even moisture distribution, making it ideal for delicious meals. With easy-to-use controls and a spacious interior, this oven is great for both novice and experienced cooks, offering a wide range of cooking options to elevate your culinary creations.
Overview of the Oster Roaster Oven
The Oster Roaster Oven is a versatile kitchen appliance designed for efficient and flavorful cooking. Available in various models like the CKSTRS23-SB-D, it features a self-basting lid that ensures even moisture distribution, perfect for roasting meats, baking, and slow cooking. With a spacious interior and adjustable temperature controls, it accommodates large dishes, making it ideal for family meals or special occasions. Its compact design saves counter space while offering the performance of a full-sized oven. The Oster Roaster Oven is a practical addition to any kitchen, combining functionality and ease of use for delicious results.
Key Features of the Oster Roaster Oven
The Oster Roaster Oven boasts a self-basting lid that ensures even moisture distribution, eliminating the need for constant basting. It features a wide temperature range, up to 450°F, allowing for versatile cooking methods. With a spacious 22-liter capacity, it can accommodate large turkeys or multiple dishes simultaneously. The digital control panel offers precise temperature and timer settings, while preset options simplify cooking. Removable racks and pans enhance convenience, and the oven’s compact design saves kitchen space. Its energy-efficient performance and durable construction make it a reliable choice for home cooks seeking consistent, high-quality results.
Benefits of Using the Oster Roaster Oven
The Oster Roaster Oven offers numerous benefits for home cooking. Its self-basting lid ensures even moisture distribution, resulting in flavorful and tender dishes without constant monitoring. The oven’s energy-efficient design uses less power than traditional ovens, making it a cost-effective option. With a spacious interior, it can handle large meals or multiple dishes at once, perfect for families or special occasions. The easy-to-use interface and preset functions simplify cooking, while the removable parts make cleanup a breeze. These features combine to provide a convenient, efficient, and enjoyable cooking experience, making the Oster Roaster Oven a valuable addition to any kitchen.
Safety Precautions
Ensure safe operation by following guidelines in the Oster Roaster Oven manual. Always use oven mitts to handle hot surfaces and avoid exposing the appliance to water. Keep children away while cooking and maintain a safe distance from flammable materials. Regularly inspect cords and plugs for damage to prevent electrical hazards.
General Safety Guidelines
To ensure safe operation of the Oster Roaster Oven, always follow the guidelines outlined in the manual. Begin by reading the entire manual carefully before first use. Avoid touching hot surfaces directly and use oven mitts or tongs to handle cookware. Keep the appliance out of reach of children and pets to prevent accidental burns or injuries. Place the oven on a stable, heat-resistant surface away from flammable materials. Regularly inspect the power cord and plugs for damage, and never submerge the appliance in water. Additionally, avoid leaving the oven unattended during cooking to maintain a safe and controlled cooking environment.
Handling the Appliance Safely
Always handle the Oster Roaster Oven with care to prevent accidents. Use oven mitts or tongs to lift or remove cookware, as surfaces may become extremely hot during operation. Avoid touching the heating elements, lid, or pan handles directly. Ensure the appliance is placed on a stable, heat-resistant surface to prevent tipping. When moving the oven, lift it gently and never pull by the cord. Keep children and pets away from the oven while it is in use. After cooking, allow the oven to cool before cleaning or storing it. Proper handling ensures safe and efficient use of your Oster Roaster Oven.
Electrical Safety Tips
To ensure safe operation, always follow electrical safety guidelines. Keep the Oster Roaster Oven away from water and moisture to prevent electrical hazards. Avoid using damaged cords or plugs, as they can cause malfunctions. Never overload electrical outlets or extension cords, as this may lead to fire risks. Ensure the appliance is plugged into a grounded outlet with the correct voltage rating. Avoid touching electrical components with wet hands, and supervise children when the oven is in use. Regularly inspect the cord and plug for wear or damage. By adhering to these electrical safety tips, you can enjoy safe and efficient cooking with your Oster Roaster Oven.
Cleaning and Maintenance Safety
Always unplug the Oster Roaster Oven before cleaning to ensure safety. Avoid using abrasive cleaners or scouring pads, as they may damage the surfaces. Instead, wipe down the exterior and interior with a soft sponge and mild soap. For tough stains, mix baking soda and water to create a gentle paste. Never submerge electrical components or the heating elements in water. After cleaning, dry all parts thoroughly to prevent rust or electrical issues. Regularly clean the drip pan and racks to avoid food buildup. Proper maintenance ensures longevity and safe operation of your Oster Roaster Oven.

Setting Up Your Oster Roaster Oven
Setting up your Oster Roaster Oven involves unpacking, inspecting, and assembling according to the manual. Place it on a stable, heat-resistant surface and plug it in safely.
Unpacking and Initial Inspection
When unpacking your Oster Roaster Oven, carefully remove all components from the box and inspect for any damage or missing parts. Ensure the oven, roasting pan, and self-basting lid are included. Before first use, thoroughly examine the appliance for any visible defects or damage sustained during shipping. If any issues are found, contact customer support immediately. Save all packaging materials and instructions for future reference. This step ensures your oven is in perfect condition and ready for safe, efficient operation.
Assembling the Roaster Oven
Begin by carefully unpacking all components and laying them out. Attach the handles to the roasting pan securely using the provided hardware. Ensure the rack is properly positioned inside the oven cavity. Next, align the self-basting lid with the oven’s rim, ensuring it fits snugly without force. Double-check that all parts are correctly assembled and aligned. If any part feels loose, tighten it according to the manufacturer’s instructions. Avoid over-tightening, as this may damage the appliance. Once assembled, confirm that the lid opens and closes smoothly. Refer to the manual for visual guidance to ensure proper assembly.
Placing the Oven in the Kitchen
Position the Oster Roaster Oven on a stable, flat surface in your kitchen, ensuring it is at least 8 inches away from any flammable materials. Choose a location with good ventilation to prevent smoke buildup. Avoid placing it near direct sunlight or damp areas, as this may affect performance. Ensure the oven is at least 4 inches away from other appliances to prevent heat interference. Place it on a heat-resistant surface, such as a countertop or table, and keep it out of reach of children. Ensure easy access to a power outlet and avoid overhanging cabinets to maintain safety and functionality.
Connecting the Appliance
To connect your Oster Roaster Oven, place it on a stable surface and plug the power cord directly into a grounded 120V electrical outlet. Avoid using extension cords or adapters, as they may cause overheating or electrical issues. Ensure the outlet is not overloaded with other appliances to maintain safe operation. Before plugging in, inspect the power cord for any damage or fraying. If damaged, do not use the oven and contact customer support for assistance. Once connected, the oven is ready for use. Always unplug the appliance when not in operation or during cleaning to ensure safety.

Operating the Oster Roaster Oven
Operating the Oster Roaster Oven is straightforward with its intuitive control panel. Simply set the temperature and timer, and let the self-basting lid ensure even cooking results effortlessly.
Understanding the Control Panel

The Oster Roaster Oven features a user-friendly control panel designed for easy navigation. The digital display allows you to set precise temperatures and timers, while buttons enable seamless function selection. The panel includes options for roasting, baking, and slow cooking, ensuring versatility. Indicator lights provide visual feedback for power status and temperature settings. The self-basting lid button automates moisture distribution, enhancing flavor. Clearly labeled buttons and intuitive layout make it simple to adjust settings mid-cooking. This thoughtful design ensures a smooth cooking experience, catering to both beginners and experienced cooks alike.
Setting the Temperature and Timer
To set the temperature on your Oster Roaster Oven, use the digital controls to select your desired heat level, ranging from 150°F to 450°F. The timer can be adjusted in 30-minute increments up to 12 hours for slow cooking. Press the temperature button to cycle through settings, and use the +/- buttons for precise adjustments. Once set, the oven displays the selected temperature and timer. Ensure the oven is preheated before cooking for optimal results. The timer will count down and alert you when cooking is complete, while the oven automatically switches to a warm setting to keep your dish ready to serve.
Using the Self-Basting Lid
The Oster Roaster Oven’s self-basting lid is designed to distribute moisture evenly, ensuring flavorful and tender results without constant manual basting. Before cooking, position the lid securely on the roaster pan. As the oven heats, the lid’s design circulates juices over the food. For optimal performance, ensure the roasting pan contains enough liquid (stock, water, or marinade) to create steam. After cooking, remove the lid carefully with oven mitts. The self-basting feature simplifies cooking, allowing you to achieve professional-grade roasts with minimal effort. Clean the lid thoroughly after each use to maintain its effectiveness and longevity.
Basic Cooking Functions
The Oster Roaster Oven offers a range of basic cooking functions that make meal preparation simple and efficient. It excels at roasting meats, baking, and slow cooking, providing even heat distribution for consistent results. The oven’s temperature control allows for precise adjustments, ensuring your dishes are cooked to perfection. With preset timer options, you can set and forget, letting the oven handle the cooking process while you attend to other tasks.
Whether you’re roasting a turkey, baking casseroles, or slow-cooking stews, the Oster Roaster Oven delivers flavorful and moist outcomes. Its intuitive controls make it easy for both novice and experienced cooks to achieve delicious meals effortlessly.

Cooking with the Oster Roaster Oven
Experience versatile cooking with the Oster Roaster Oven, featuring a self-basting lid for moist results and even heat distribution. Perfect for roasting, baking, and slow-cooking delicious meals.
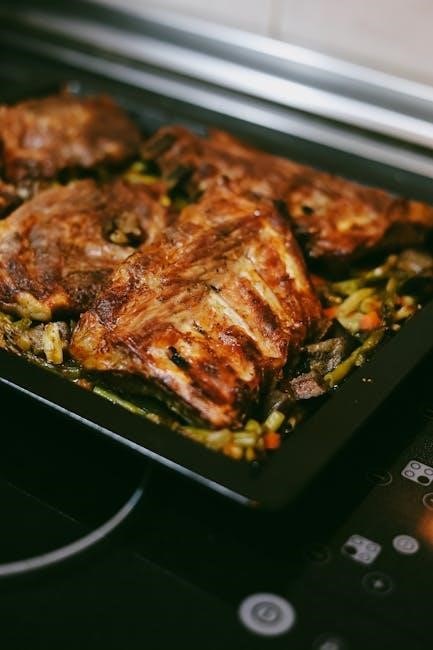
Roasting Meat (Turkey, Chicken, etc.)
The Oster Roaster Oven excels at roasting large meats like turkey and chicken. Its self-basting lid ensures consistent moisture, eliminating the need for frequent basting. Pre-season your meat, place it in the roasting pan, and set the temperature and timer as per your recipe. For a turkey, roast at 325°F, calculating about 20 minutes per pound. For chicken, use 375°F for crispy skin. Always check internal temperatures (165°F for chicken, 180°F for turkey) to ensure safety. Let the meat rest before carving to retain juices. This method guarantees tender, flavorful results every time.
Cooking Vegetables
The Oster Roaster Oven is ideal for cooking a variety of vegetables to perfection. Whether roasting, baking, or slow-cooking, it ensures tender and flavorful results. For roasting, cut vegetables like Brussels sprouts or carrots into bite-sized pieces, toss with olive oil and seasonings, and roast at 425°F for 20-30 minutes. For baked root vegetables, wrap sweet potatoes or squash in foil and bake at 375°F for 45 minutes. Slow-cooking vegetables at 275°F for 2-3 hours yields soft, caramelized textures. Stir halfway through cooking for even browning and seasoning distribution, enhancing the natural flavors of your vegetables.
Baking in the Roaster Oven
Baking in the Oster Roaster Oven is a breeze, thanks to its even heating and precise temperature control. Perfect for cakes, cookies, and pastries, it ensures consistent results every time. Use the roaster oven to bake bread, pies, or casseroles with ease. The self-basting lid helps maintain moisture, creating a golden-brown crust on baked goods. For best results, preheat the oven as instructed and use oven-safe bakeware. Follow the user manual for specific temperature and timing guidelines. The Oster Roaster Oven simplifies baking, making it accessible for both novice and experienced bakers. Achieve professional-quality treats with minimal effort!
Specialty Cooking Options
The Oster Roaster Oven offers versatile specialty cooking options to enhance your culinary experience. Use the slow cooking function for tender stews and braises, while the dehydration mode allows you to create healthy snacks like fruit leather or jerky. The oven also excels at proofing dough for homemade bread, ensuring perfectly risen loaves. With adjustable temperature controls, you can explore advanced techniques like sous vide or precision cooking. These features make the Oster Roaster Oven a multi-functional appliance, perfect for experimenting with new recipes and achieving professional-grade results in the comfort of your home. Expand your cooking horizons with its innovative capabilities!

Maintenance and Troubleshooting
Regularly clean the Oster Roaster Oven to prevent food residue buildup. Store it in a dry place when not in use. Troubleshoot issues like uneven heating or malfunctioning parts by consulting the user manual or contacting customer support for assistance.
Cleaning the Oster Roaster Oven
Regular cleaning is essential to maintain the performance and longevity of your Oster Roaster Oven. Always unplug the appliance before cleaning. Use oven mitts to remove the roasting pan and racks, then wash them with mild soap and warm water. Avoid using abrasive cleaners or scouring pads, as they may damage the surfaces. For tough food residue, soak the parts in warm soapy water before scrubbing. Dry all components thoroughly to prevent rust. Wipe the exterior with a damp cloth, avoiding electrical components. Never submerge the oven in water. Cleaning regularly ensures optimal functionality and prevents food buildup.
Storing the Appliance
Proper storage of your Oster Roaster Oven ensures its longevity and maintains its performance. Before storing, clean the oven thoroughly and allow it to cool completely to prevent moisture buildup. For extended storage, place the roaster oven in its original packaging or cover it with a protective cloth to shield it from dust. Store it in a cool, dry location, away from direct sunlight and moisture. Keep the appliance upright to prevent damage to the heating elements. Avoid stacking heavy objects on top of the oven. Regularly inspect the storage area to ensure it remains dry and secure.
Troubleshooting Common Issues
If the Oster Roaster Oven is not heating, ensure it is properly plugged in and the outlet is functional. Check the temperature and timer settings for accuracy. For uneven cooking, verify food placement and use the self-basting lid correctly. If the lid is not sealing, clean it thoroughly to remove any food residue. Avoid using abrasive cleaners, as they may damage the finish. For digital models, reset the oven by unplugging it for 30 seconds. Consult the user manual for specific solutions, and contact customer support if issues persist. Regular maintenance can prevent many common problems.
Replacing Parts and Accessories
To replace parts or accessories for your Oster Roaster Oven, visit the official Oster website or authorized retailers. Ensure compatibility by referencing your model number in the user manual. Common replacements include the roasting pan, racks, or self-basting lid. For damaged or worn-out parts, purchase genuine Oster accessories to maintain performance and safety. Avoid using unauthorized parts, as they may void the warranty or compromise functionality. If unsure, contact customer support for guidance. Regularly inspect and replace worn parts to ensure optimal cooking results and longevity of your appliance.
Advanced Features and Tips
The Oster Roaster Oven offers advanced features like self-basting lids for effortless moisture retention and energy-efficient cooking. Explore new recipes and techniques to maximize its versatility and performance.
Using the Self-Basting Lid Effectively
The self-basting lid of the Oster Roaster Oven is a standout feature designed to enhance cooking results. It ensures continuous moisture circulation, preventing dryness and locking in flavors. To use it effectively, ensure the lid is properly seated to maximize basting efficiency. For optimal performance, periodically check and clean the basting tube to avoid clogging. This feature is particularly beneficial for roasting meats like turkey or chicken, as it reduces the need for manual basting. Proper use of the self-basting lid guarantees tender, juicy results every time, making it a key tool for achieving professional-grade cooking outcomes at home.
Optimizing Cooking Results
For the best cooking outcomes with your Oster Roaster Oven, it’s essential to use its features wisely. Preheat the oven before cooking to ensure even heating. Use the self-basting lid to maintain moisture and flavor, especially for meats. Always place food in the center of the roasting pan to promote airflow. Avoid overcrowding, as this can hinder cooking efficiency. Regularly clean the oven to prevent residue buildup, which can affect performance. Experiment with temperature settings and cooking times to suit your recipes. Properly positioning the pan and utilizing the oven’s versatility will help you achieve perfectly cooked, flavorful dishes every time.
Energy Efficiency Tips
To maximize energy efficiency with your Oster Roaster Oven, preheat it only when necessary and for the shortest required time. Use the self-basting lid to reduce cooking time by maintaining even moisture. Lower the temperature slightly if possible, as the oven retains heat well. Avoid frequent opening of the lid, as this releases heat and increases energy consumption. Ensure the oven is clean, as food residue can affect heating efficiency. For smaller meals, consider using the roaster oven instead of a full-size oven to save energy. These practices help optimize performance while reducing power usage.
Exploring Additional Cooking Techniques
The Oster Roaster Oven opens up a world of creative cooking possibilities. Experiment with slow cooking for tender meats and stews, or try steam roasting for crisp vegetables. Use the self-basting lid to infuse flavors without constant attention. For bread enthusiasts, the oven’s even heat is perfect for baking crusty loaves or artisanal breads. You can also adapt recipes for casseroles, lasagnas, or roasted potatoes, leveraging the oven’s versatility. Don’t hesitate to innovate by combining traditional methods with modern twists, ensuring every dish is a culinary success. This oven truly expands your cooking horizons with endless possibilities.
The Oster Roaster Oven is a valuable addition to any kitchen, offering versatile cooking options. For detailed guidance, refer to the user manual, and visit Oster’s website for support and additional resources;
Final Thoughts on the Oster Roaster Oven
The Oster Roaster Oven is a reliable and efficient kitchen appliance designed to simplify cooking while delivering exceptional results. Its self-basting lid and versatile functions make it ideal for roasting, baking, and slow cooking. With easy-to-use controls and a spacious interior, it accommodates large meals, perfect for family gatherings or special occasions. The oven’s durability and energy efficiency further enhance its value. For optimal performance, always refer to the user manual, which provides detailed instructions and troubleshooting tips. Oster’s customer support and online resources ensure you can maximize your cooking experience with this versatile appliance.
Where to Find Instruction Manuals
The Oster Roaster Oven instruction manual can be easily accessed online. Visit the official Oster website or authorized retailers like Amazon for free PDF downloads. Models such as the CKSTRS23-SB-D and CKSTRS18-BSB have dedicated manuals available. Additionally, websites like ManualsLib and ManualsOnline host these guides. For convenience, download the Oster Roaster Oven User Guide directly from the manufacturer’s support page. Ensure to select the correct model number for accurate instructions. If you encounter issues, contact Oster’s customer support for assistance; These resources provide detailed setup, usage, and troubleshooting information to maximize your appliance’s performance.
Accessing Customer Support
For assistance with your Oster Roaster Oven, visit the official Oster website and navigate to the Customer Support section. Here, you can find contact information, including phone numbers, email addresses, and web forms. Representatives are available to address questions, troubleshooting, and concerns. Additionally, the website offers FAQs and downloadable resources. If you encounter issues with your Oster Roaster Oven, such as login problems or connectivity errors, support agents can guide you through solutions. Ensure to have your product model number ready for efficient assistance. This service is designed to help you maximize your appliance’s performance and resolve any challenges promptly.